How to Configure SSL Encryption for Custom Domains on Pivotal CF

Where to start?
The new Pivotal SSL Service has made it possible to use your own certificates in PCF—both domain-specific and wildcard. This means SSL/TLS encryption can now be added to apps in custom domains. However, if you work with Apache Tomcat and JKS, you may find that the official documentation provides the main instructions, but—unfortunately—does not cover the details.
As a Java developer, I am used to dealing with SSL certificates in the JKS format that can be used in Apache Tomcat configuration. Normally, you will need to have something similar to this connection definition in your server.xml:
    <Connector port="8443"
                protocol="org.apache.coyote.http11.Http11Protocol"
                keystoreFile="my.keystore"
                keystorePass="password"
                keyAlias="mysite"  URIEncoding="UTF-8"
              maxThreads="150" SSLEnabled="true" scheme="https" secure="true"
            clientAuth="false" sslProtocol="TLS" />
If you already have a certificate, it is probably declared here. If not, below are step-by-step instructions on how to create it from scratch.
Generating a JKS certificate
The my.keystore file was created using the command:
keytool -genkey -alias [youralias] -keyalg RSA -keystore [/preferred/keystore/path/my.keystore]
Keep in mind that the Common Name—which answers the question “What is your first and last name?”—should be your domain name:
    What is your first and last name?
      [Unknown]:  www.mysite.com
    What is the name of your organizational unit?
      [Unknown]:  Unit
    What is the name of your organization?
      [Unknown]:  Organization
    What is the name of your City or Locality?
      [Unknown]:  City
    What is the name of your State or Province?
      [Unknown]:  State
    What is the two-letter country code for this unit?
      [Unknown]:  US
    Is CN=www.mysite.com, OU=Unit, O=Organization, L=City, ST=State, C=US correct?
      [no]:  yes
Generating a CSR file
Then, the CSR file was generated with:
keytool -certreq -keyalg RSA -alias [youralias] -file [my].csr -keystore [path/to/your/keystore/my.keystore]
Getting your certificates signed
The CSR file that you have just created needs to be submitted to a certification authority, like GoDaddy or Comodo. After domain validation, you will receive a ZIP archive with a set of *.crt files. In my case, it was gd_bundle-g2-g1.crt with root and intermediate certificates and 79bd1f68a63.crt with a certificate for the validated domain.
Creating a chain.crt file
All these *.crt files need to be copied to a single chain.crt file that looks like this:
      -----BEGIN CERTIFICATE-----
      ……..
      -----END CERTIFICATE-----
      -----BEGIN CERTIFICATE-----
      ……..
      -----END CERTIFICATE-----
      -----BEGIN CERTIFICATE-----
      ……...
      -----END CERTIFICATE-----
      (…and so on)
Converting JKS to RSA
With both my.keystore (the private key) and chain.crt (a set of certificates) in place, we are about to complete SSL service configuration. But first, our private key must be converted from JKS to the RSA format. That can be done in a number of different ways. Here is just one of them:
- convert JKS to p12:
- convert p12 to an encrypted .pem file:
- create an RSA private key that can be used in PCF:
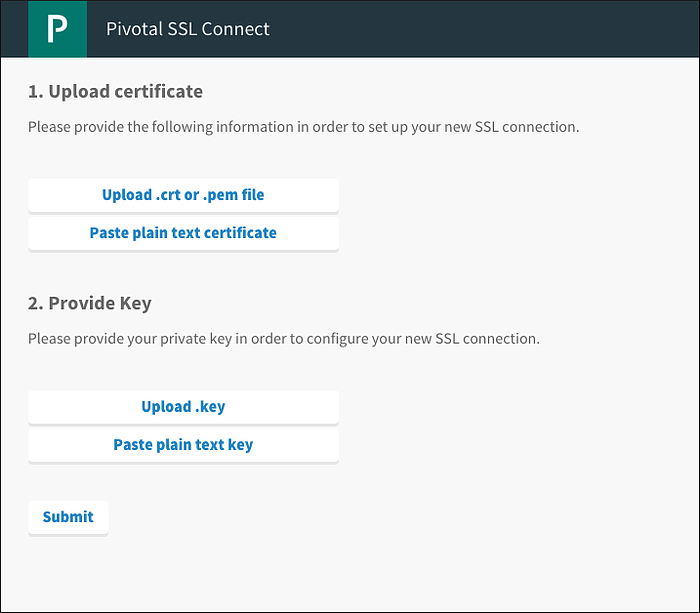
In step one, click the “Upload .crt” button and select the chain.crt file with all the certificates included.
In step two, click “Upload .key” and select the my.key file created by the openssl utility. Then, click “Submit.”
keytool -importkeystore -srckeystore my.keystore -destkeystore my.p12 -srcstoretype jks -deststoretype pkcs12
openssl pkcs12 -in my.p12 -out my.pem
openssl rsa -in my.pem -out my.key
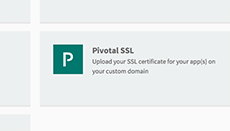
Creating a new SSL service
Now we can create a new SSL service using the Pivotal CF GUI:
If everything was done correctly, you should see this page:
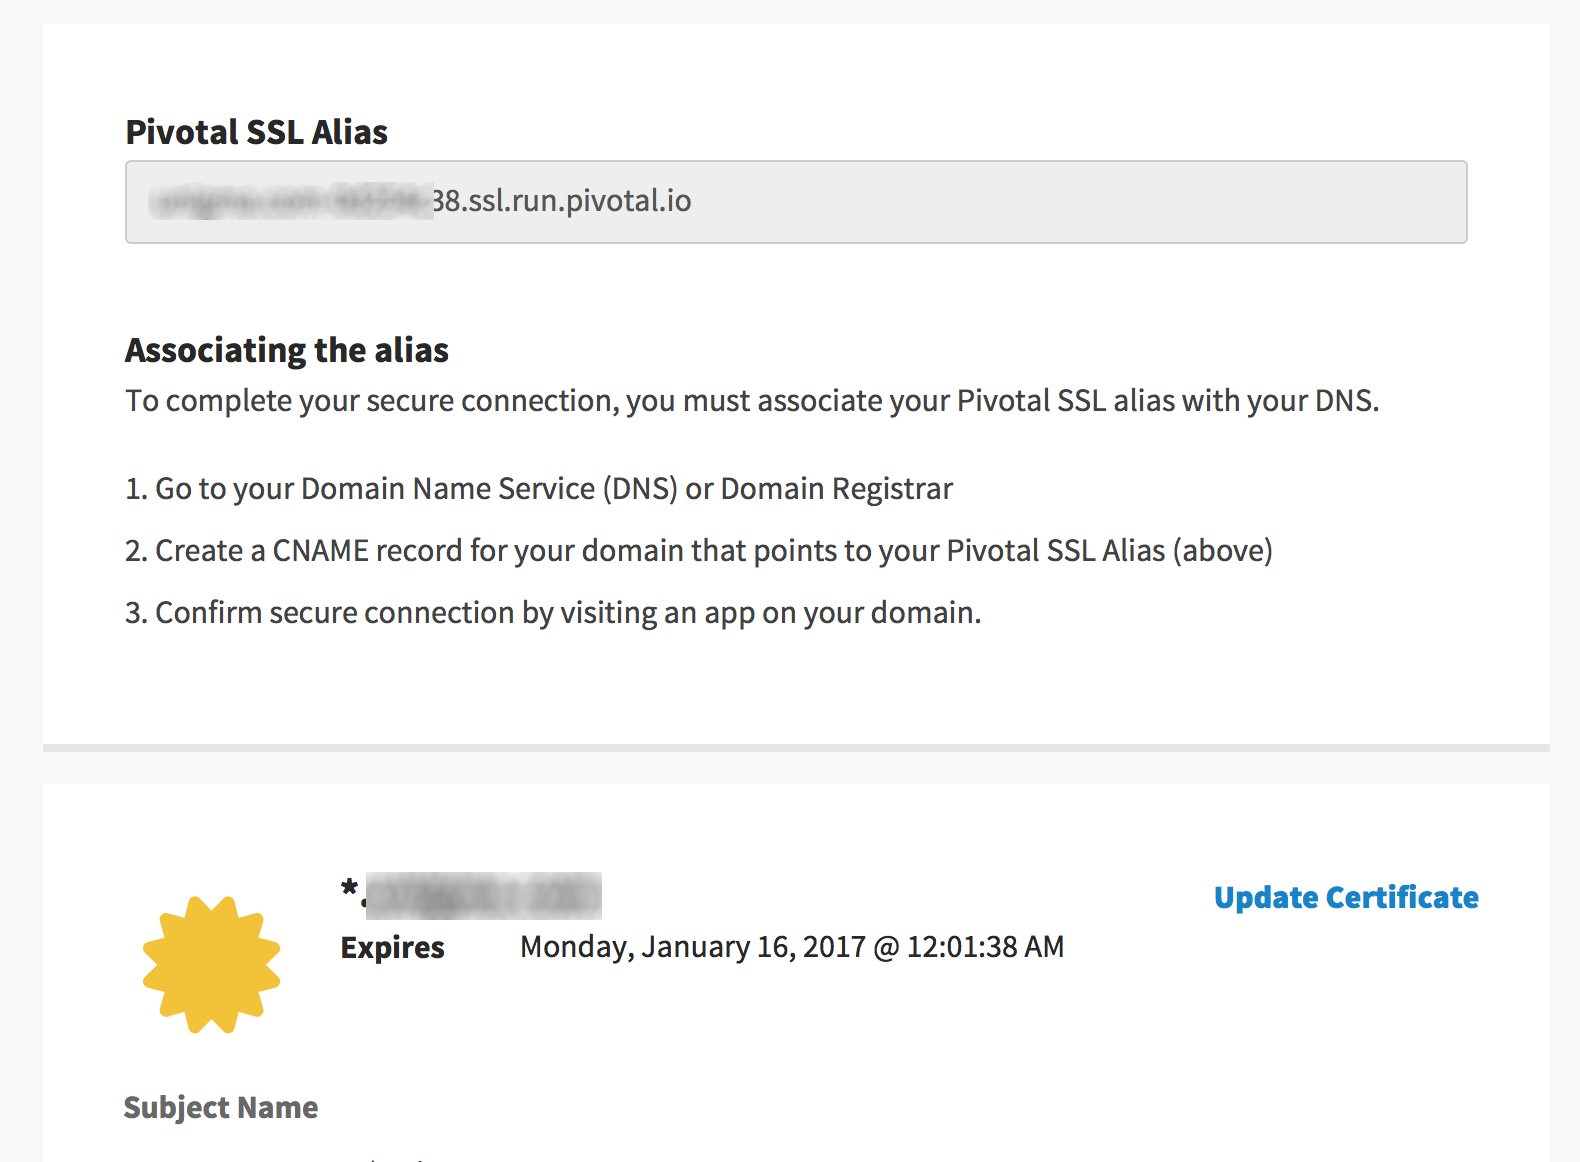
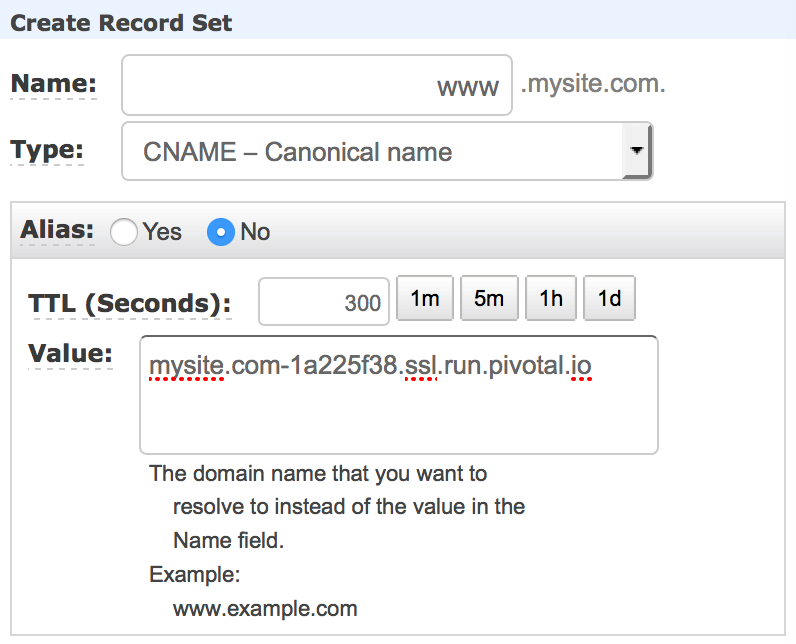
Creating a DNS CNAME record
After your application has been deployed to Cloud Foundry, the domain needs to be registered with:
cf create-domain Mysite mysite.com
We also need to map a route with:
cf map-route mysiteappname mysite.com -n "*"
The final step is creating a DNS CNAME record. In Amazon Web Services, that can be done using the Route53 service:
Now all requests to https://www.mysite.com will be encrypted using your own SSL certificate for the custom domain mysite.com, but http://mysite.cfapps.io is still working, providing access to your website via a non-encrypted connection.
Redirecting HTTP traffic to HTTPS
At this moment, there are no additional settings in the Pivotal SSL service and you cannot automatically redirect HTTP traffic to HTTPS. As a temporary workaround, that can be done using the following configuration in Spring Boot:
@SpringBootApplication
@RestController
public class SslTestApplication {

    @Bean
    public TomcatEmbeddedServletContainerFactory tomcatEmbeddedServletContainerFactory(){
     return new TomcatEmbeddedServletContainerFactory() {
       @Override
       protected void postProcessContext(Context context) {
         SecurityConstraint securityConstraint = new SecurityConstraint();
         securityConstraint.setUserConstraint("CONFIDENTIAL");
         SecurityCollection collection = new SecurityCollection();
         collection.addPattern("/*");
         securityConstraint.addCollection(collection);
         context.addConstraint(securityConstraint);
       }
     };
    }

    public static void main(String[] args) {
     SpringApplication.run(SslTestApplication.class, args);
    }
}
If you add this code to your Spring Boot app, all requests will be forced to go through HTTPS—via a secure path.